
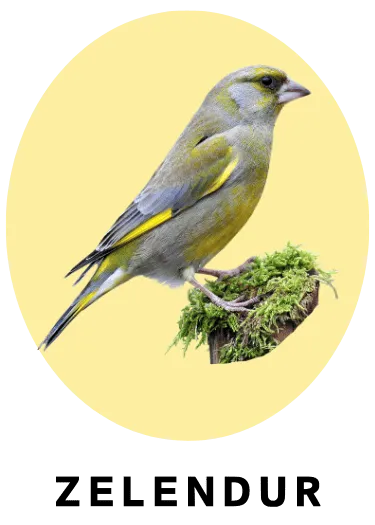
Raising a baby greenfinch
Identification and Proper Hand-Rearing
Nestlings (chicks that have fallen out of the nest and need help) and fledglings are young birds that often end up outside the nest, but that does not mean they always need your help. In this article I will explain how to recognise a chick that needs help, how to react properly and how to prepare it for release back into the wild.
Nestling or Fledgling?
Fledglings are young birds that have left the nest but are not yet able to fly on their own. They can often be found on the ground, but that does not mean they are in danger. Fledglings have only just started practising flying and still depend on their parents for food.
Nestlings: they have no feathers, and slightly older ones that have fallen out of the nest are partly feathered but still a little clumsy and need help.
Fledglings: they have almost fully developed feathers and are trying to fly, but they still depend on their parents.
When Is Help Needed?
Injured chicks: If you notice that the chick is injured (bleeding, broken wing, unable to stand), it needs a vet's help.
Chicks without parents: If no parents come to feed the chick after several hours, it may have been abandoned.
Chicks in danger: If the chick is in a dangerous place (near a road, close to predators), move it to a safe spot.
How Can You Help a Greenfinch Chick?
Watch from a distance: Before stepping in, watch the chick from a distance to determine whether it really needs help.
Move it safely: If the chick is in danger, carefully move it to a safe spot nearby.
Contact experts: If the chick needs medical help, contact a vet.
Feeding a naked greenfinch nestling
Use a hand-rearing formula for birds (Nutribird A21, or a similar one).
A drop of probiotic or a little crushed bird calcium can be added occasionally
Never give milk, bread or water directly into the beak!
➡ Mix the formula in a ratio of 1:3 (1 part powder, 3 parts lukewarm water). The texture should be smooth and lump-free, like yoghurt.
➡ The food must be warm (about 38°C) – never cold or too hot! You can test a drop on the inside of your wrist.
Feeding technique
✅ Use a needle-free syringe or a soft pipette – this is the safest way to make sure the chick gets enough food.
✅ Feed from the side of the beak, gently giving it droplets and waiting for it to swallow before you continue.
✅ Do not put food directly into the throat! – there is a risk of choking or food getting into the windpipe.
✅ The chick will open its beak by itself when it is hungry – don't force it.
Feeding frequency
0–3 days old: Every 20–30 minutes (from morning to evening, not at night).
4–7 days: Every 30–45 minutes.
7–10 days: Every hour.
10+ days: The intervals get longer and the chick starts learning to eat by itself.
➡ When its crop (the pouch below the throat) is empty, you can feed it again.
How to keep a naked chick warm
Because it has no feathers, it cannot regulate its body temperature and can die quickly if it gets chilled.
Use a heating pad (put it under a towel, never directly under the chick).
If you do not have a heater, you can use a bottle of warm water (wrapped in a towel).
Ideal temperature:
1–5 days: 34–36°C
5–10 days: 30–32°C
10+ days: 28°C, then lower it gradually.
✅ Nest:
Make a soft nest from warm cotton cloths or paper towels in a small box with ventilation holes.
Do not use cotton wool – it can get tangled around the chick’s legs.
➡ How can you tell it is cold? If it doesn't move, shivers and is not active. If it is too hot, it will spread its wings and breathe with its beak open
If the chick already has feathers but is not yet eating on its own, its diet should be adapted to its developmental needs, and it should be housed in a larger cage or box.
Type of food
✅ Hand-feeding formula (Nutribird A21 or similar) – mixed thicker than for younger chicks, like a runny purée.
✅ Soaked kibble for toy-breed puppies
✅ Finely chopped insects – dried mealworms, fruit flies, finely chopped grasshoppers.
✅ Soft food for insectivorous birds – available in bird shops.
✅ Soaked seeds – millet, canary seed, oats (leave them in water to soften).
🚫 Do not give milk, bread, dry seeds that have not been soaked, or salted or seasoned food!
NOTE: Chicks need protein while they are developing, for proper growth and development!
Feeding frequency
10–14 days old: every 1–2 hours; it may start pecking at food on its own.
15–20 days old: Every 3–4 hours; leave food available so that it starts learning to eat by itself.
20+ days: It starts feeding itself but may still ask to be hand-fed a few times a day.
➡ A sign that it is full: the chick stops begging for food and its crop (the pouch below the neck) is full.
Moving on to self-feeding
✅ Place a small dish with small seeds and live insects nearby.
✅ Show it the food – gently tap the dish with your finger so that it sees that this is food.
✅ When you see it starting to eat on its own, gradually cut down on hand-feeding.
✅ Always provide fresh water in a shallow dish.
➡ Once it has fully switched to feeding itself and can fly, it can be prepared for release into the wild.
Preparing for Release into the Wild
The greenfinch is getting ready for an independent life in the wild. When it starts showing interest in pecking at food and eating on its own, the crucial period of adjustment begins.
How do you teach it to eat on its own?
The switch from feeding with a syringe or pipette to self-feeding should be gradual. Put crushed and softened seeds in its cage, such as sunflower, hemp and flax seeds, and add fresh plant sprouts, buds and berries so that it gets used to a natural diet. You can also offer it soft insects such as mealworms to make sure it gets enough protein for proper development.
Putting food in shallow dishes on the floor of the cage can also encourage self-feeding, as young greenfinches often explore food by pecking at the ground. You can encourage it to eat by showing it the food and gently touching its beak.
Signs that it is ready for release into the wild
Before it is released, a greenfinch should be in good condition and able to fly well. The key signs of readiness include:
Feeding itself on a varied diet
Fully developed plumage
Strong flight muscles and the ability to fly for long periods
A natural instinctive fear of people, which helps it survive
Conclusion
It is best to prepare the bird in a large outdoor aviary, where it can practise flying and gradually get used to the weather.
Release should take place in an area where greenfinches occur naturally – near meadows, woodland and orchards. A gradual (soft) release is recommended, where the bird can leave the aviary on its own but also come back if it feels the need. If that is not possible, choose a quiet spot, early in the morning or late in the afternoon, when there are fewest predators about.
Proper preparation ensures that the young greenfinch will adapt successfully and have the best possible chance of survival in the wild.