
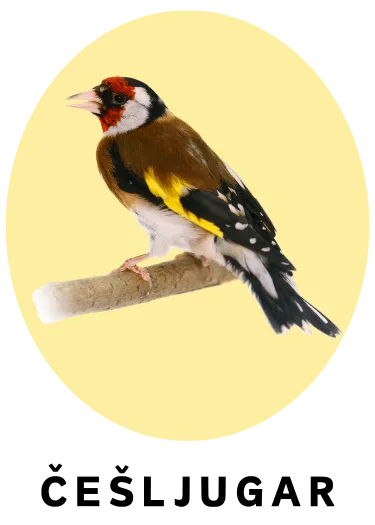
Raising a baby goldfinch
Hand-rearing a goldfinch chick
If you have found a European goldfinch chick (in Croatian also called grdelin), it is important to approach hand-rearing with great care and patience. Goldfinches are sensitive birds that need specific conditions for a successful recovery and return to the wild. Here you will find a detailed guide on how to raise the chick properly, give it suitable housing and prepare it for its return to the wild.
First steps – check the chick’s condition
Before you start feeding, check the chick’s general health. If the chick has open wounds, shows signs of severe stress or does not move, it is best to consult a vet. If the chick has simply been pushed out of the nest and shows signs of recovering, you can go ahead with feeding.
Ideal housing for a goldfinch chick
A goldfinch chick needs a safe, warm place so that it feels secure and can recover. For housing, it is ideal to use a box or cage with enough room to move around. This space should be warm but not too hot. The temperature should be between 28 and 32°C so that the chick can develop its thermoregulation normally.
For heating, you can use heaters with thermostats to maintain a constant temperature. Give the chick soft bedding such as fabric or paper, or put in a little hay, but avoid materials that could be harmful if swallowed.
How to feed a goldfinch chick
Feeding is a key part of hand-rearing a chick. At first, a goldfinch chick needs soft food that is easy to digest. You can use a specialised hand-feeding formula for birds or prepare a mixture of egg and fruit.
You can feed the chick every 2–3 hours during the day, including night feeds, bearing in mind that newly hatched chicks need more frequent feeding. The amount of food can be increased as the chick grows. The starting amount is about 5–10 ml per feed depending on its size and age, increasing over time to 15–20 ml. Feed the chick slowly, using a needle-free syringe or a small pipette, to avoid choking.
Food for older goldfinch chicks
At first, it is best to use a mixture of finely chopped egg, soft bird food or hand-feeding formula for baby birds, suited to species that eat fruit and seeds. As the chick grows, you can start introducing small seeds and fruit (such as apples, pears and strawberries). Make sure the food is always fresh and free from pesticides.
Ideal housing for a goldfinch chick
When housing a goldfinch chick, the most important thing is to provide a safe, warm and quiet place where the chick can recover and develop.
To begin with, it is best to use a small cage or box so that the chick is safe but has enough room to move around. A box is often better because it makes the chick feel more secure, while a cage can be good later on, when the chick becomes more active. Either way, the chick should have enough room to fly when it is ready.
Put soft bedding such as paper, hay or fabric on the bottom of the cage or box. This will give the chick a comfortable place to rest; at the same time, avoid dusty materials that could irritate the chick’s respiratory system.
Room temperature also plays a key role in the chick’s recovery. The ideal temperature for housing a goldfinch chick is between 28 and 32°C. You can use a heater with a thermostat to maintain a constant temperature, but be careful not to overheat the chick. Too much heat can be harmful to it.
Chicks need a calm environment without excessive noise or disturbance. It is recommended to keep the chick in a quiet place, out of reach of other pets and away from too much light and noise. Such conditions will help the chick recover from stress and adapt to its new surroundings.
If you use heat lamps, position them so that they are not too close to the chick but still provide the warmth it needs. Make sure the temperature is stable and does not rise too much, because too much heat can cause discomfort or other health problems, and even death from overheating.
Also give the chick privacy by keeping it in a box or cage with a lid or sides that provide cover. This will stop other pets or people from disturbing the chick and help it feel safe and protected.
The aim is to create a calm environment with enough light but no direct sunlight, and to avoid draughts and large temperature fluctuations.
The chick’s health and monitoring its progress
Check the chick’s weight and activity regularly. If the chick shows no signs of recovery or is not growing as it should, contact a vet.
When to start releasing it into the wild?
After a few weeks of feeding and recovery, the goldfinch chick starts developing the ability to fly. At this stage, give the chick its first contact with the natural environment. Ideally, let it out in a safe, enclosed space (such as a terrace or a fenced garden) where it can learn to fly without danger from predators. The bird will also start developing the social skills and behaviours typical of goldfinches.
Preparing the chick for release
Before you release it into the wild, make sure the chick can fly strongly enough and is able to find food and water in its natural surroundings. Also bear in mind that it is not advisable to keep the bird in captivity for too long, as it could become weaker and lose the ability to live independently in the wild.
Tips for releasing it into the wild
The first time you release it, choose a quiet, safe place with enough food and shelter, and over time the chick will learn to look after itself. Pay attention to the weather – the best time for release is during the warmer months, when food is available and young birds can survive easily.
Conclusion
Hand-rearing a goldfinch chick is a process that requires attention and patience. The right diet, temperature and a safe environment are key to a successful recovery and later return to the wild. By following these guidelines, you will help the chick become part of the natural ecosystem again.